

(This is a bit of a random thing, and I'm not sure where else to post this.)
This is a tutorial of sorts on how to use the GameCube A/V cable on a Wii. I'm unsure if one already exists, but I felt like making my own. This isn't entirely useful, but it can be helpful in certain situations, or if you want to just mess around with things. Hopefully this helps anyone out who is looking to do this.
Please consider leaving a comment letting me know how it went, since I haven't tested the clean cut way of doing this, and I'm unsure if it will function the same. I can update this post if needed to fix anything I may have messed up as well.
**DISCLAIMER**
This mod involves cutting a portion the plastic connector on an old GameCube A/V cable. Only do this mod if you don’t care for the cable’s original condition, and wish to use it on your Wii (and if you for whatever reason don’t own an A/V cable for the Wii.)
I am not responsible for what happens, so please be careful. (Even if this tutorial is roughly made.)
For reference, here are two pictures of all three cables. They are in the same order in each image. (Ignore the condition of the cables outside the modding. Two of these cables I’ve had for many many years sitting around, so I don’t bother actually cleaning them since I don’t really use them):
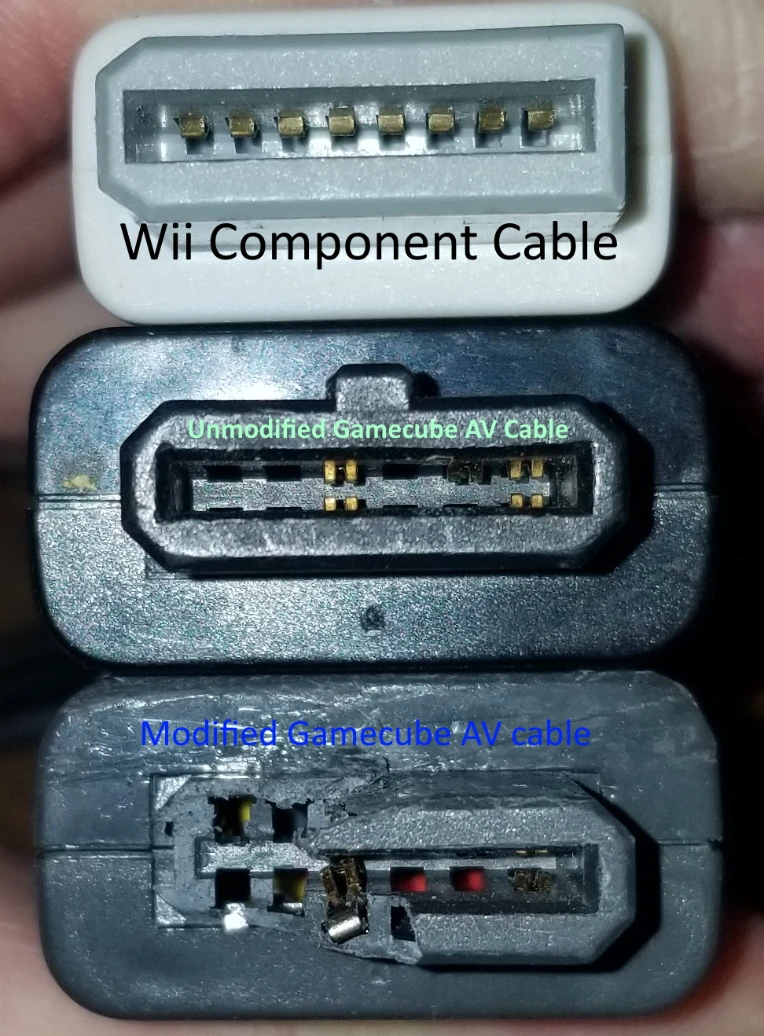

As you can see, the modified cable looks damaged, but it does work. I used a pocket knife for the rough mod I did initially, so that’s why it looks that way.
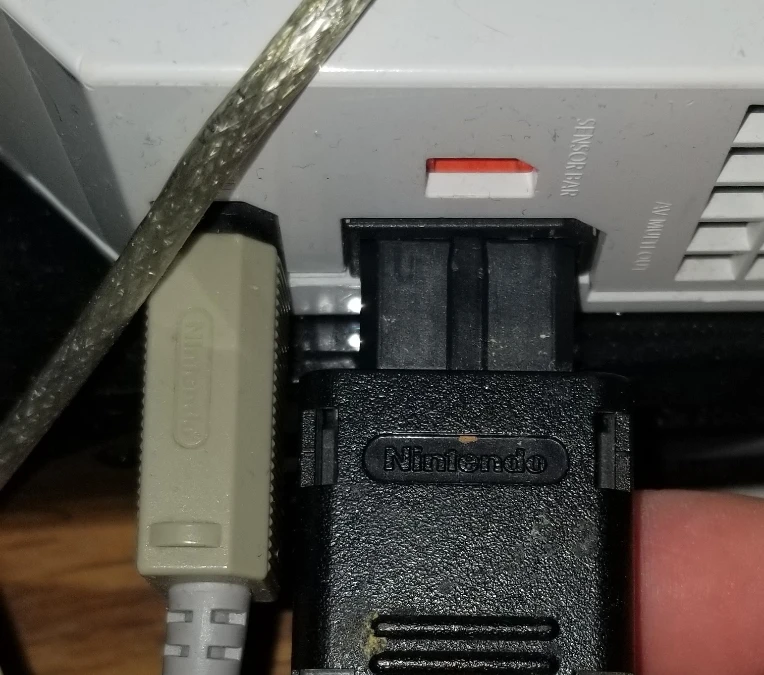
If you go to put in the A/V cable into the Wii right now, you’ll immediately notice a problem, That being: It doesn’t fit due to the cable being shaped differently, and probably because of the size of the connector itself. (I honestly don’t know if sanding it to the same shape will let it fit in. But even then the connector may not fit entirely, I’m unsure. I forget when I was initially testing the connector throughout the initial mod)
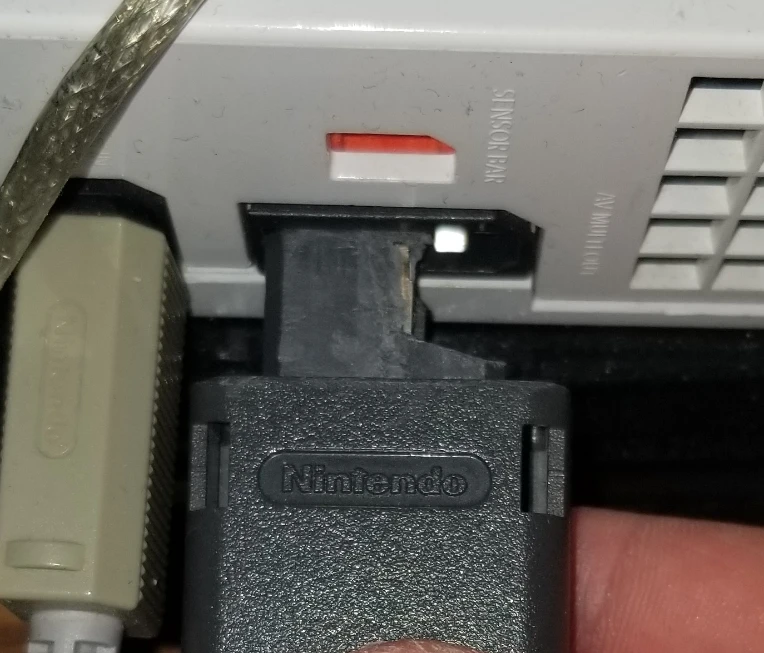
With the modded cable (below), you can see that it has more than enough room to plug into the port. (The somewhat bent pins still make the proper connections.)
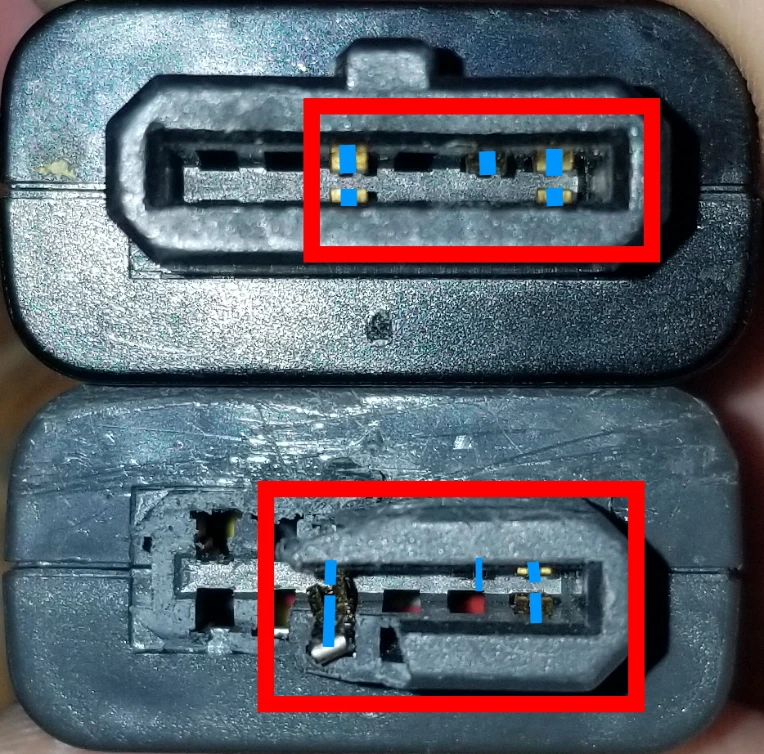
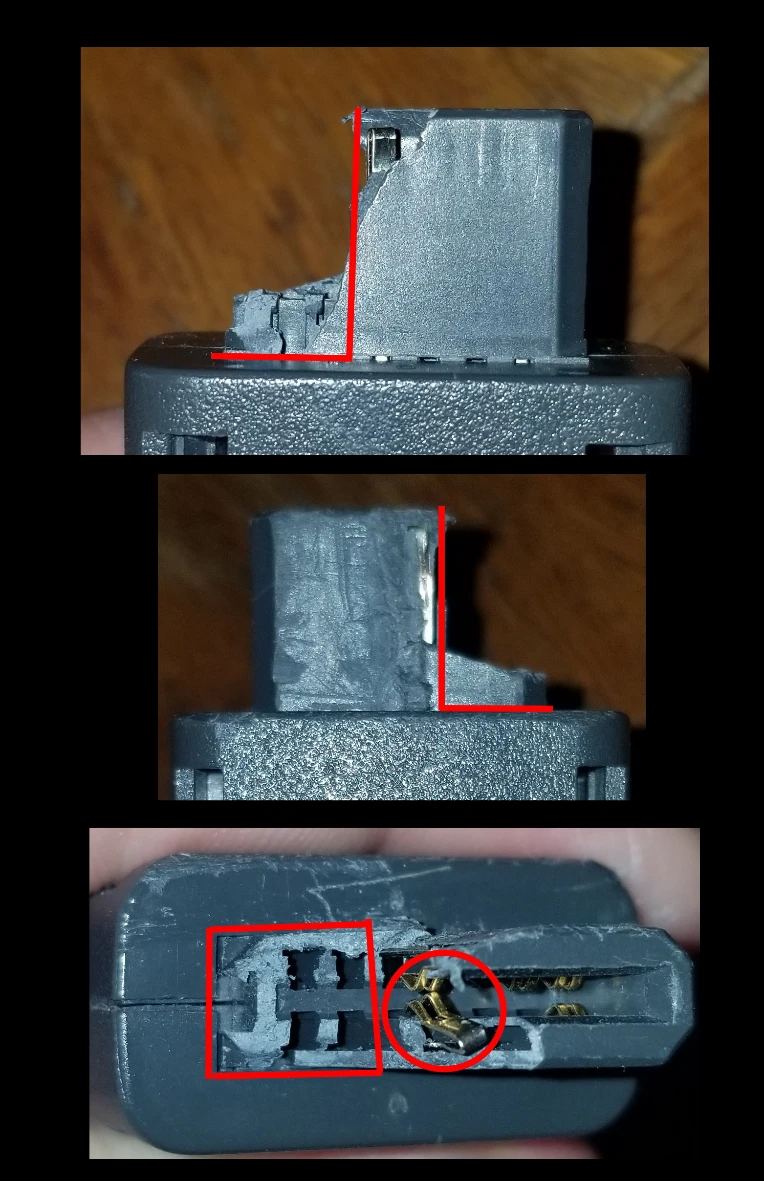
Now, the first thing to note is the layout of the pins so you know exactly where to cut. (I want to say all the layouts are the same, but you’d have to look at your cable up close to make sure) The pins are marked in the middle with blue lines.
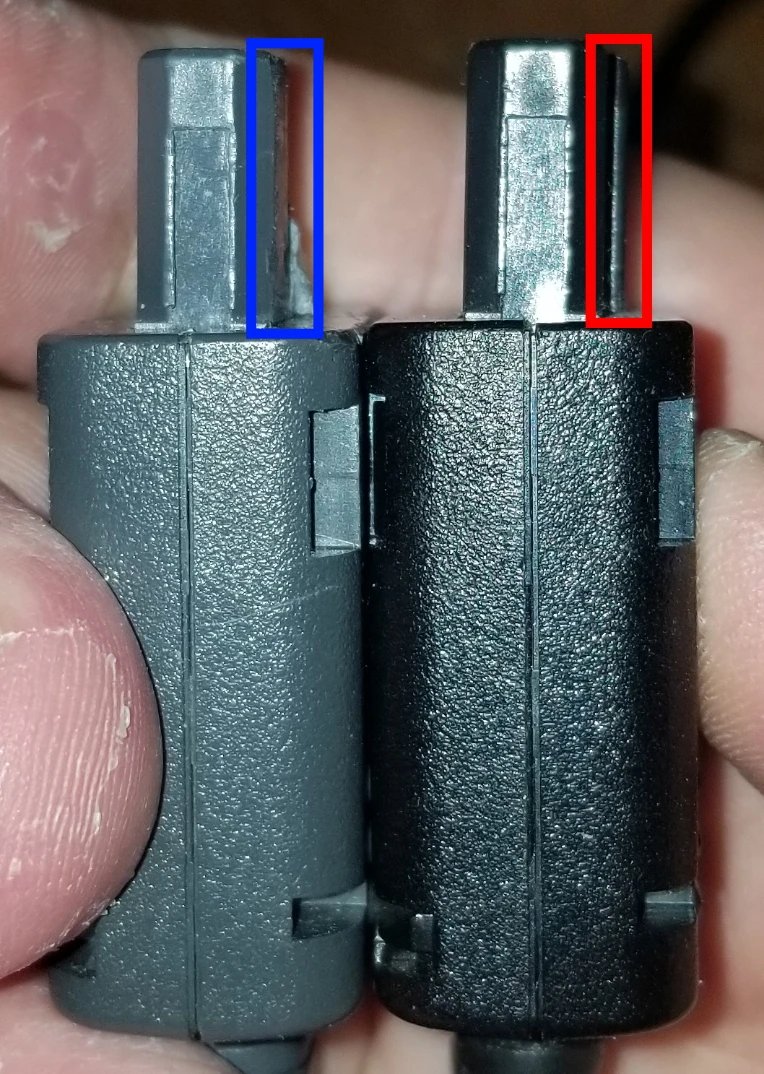
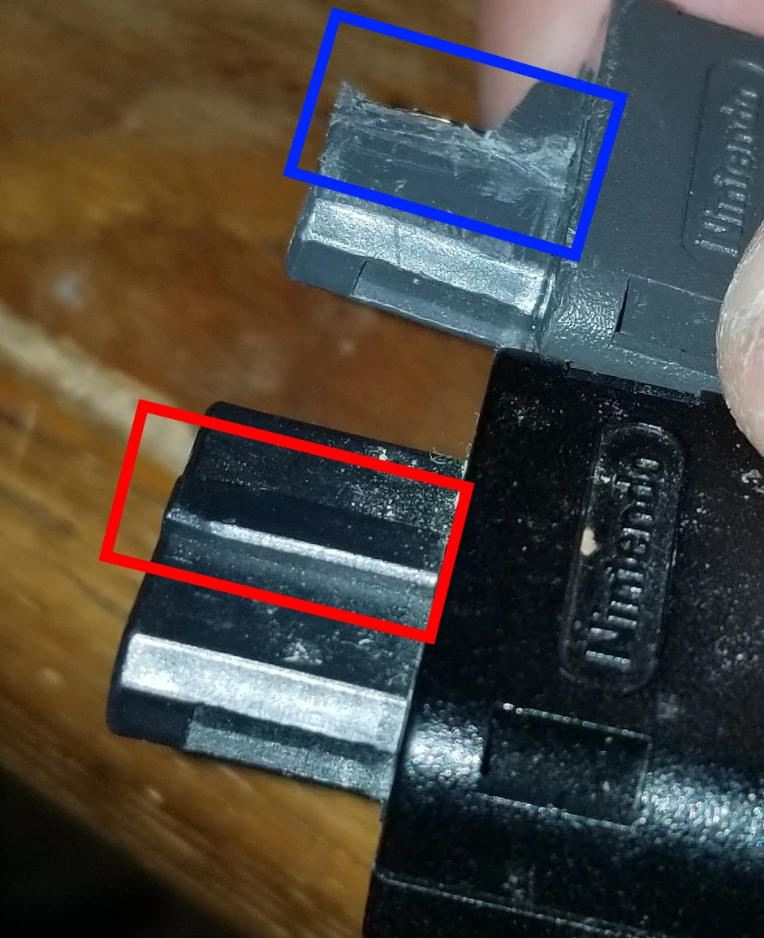
To achieve this, (In a much cleaner fashion from what I can gather), you will want to sand off the top lip that is jutting out of the cable that usually slides into the GameCube port. (The red is showing the lip, and the blue is showing the already removed lip)
Once that is done, you will want to turn your attention to the inside of the connector once more.
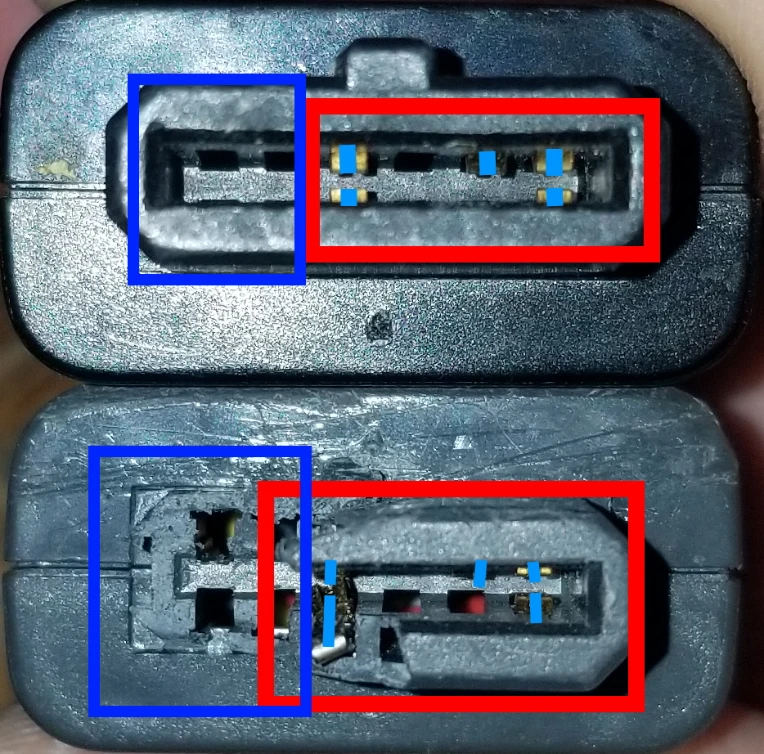
If we refer back to the Pin Layout image, There are 5 pins inside the connector, two are in pairs, and one is in the right center in-between the pairs on the top (It's kind of hard to see the actual pin, but the blue line is there). Where you will be focusing is the “dead-zone” that lacks any pins on the left, as shown in the dark blue squares. (There is something that does look like a pin on the left on the modified one, but I think that’s just something inside the connector and not an actual pin that sticks out)
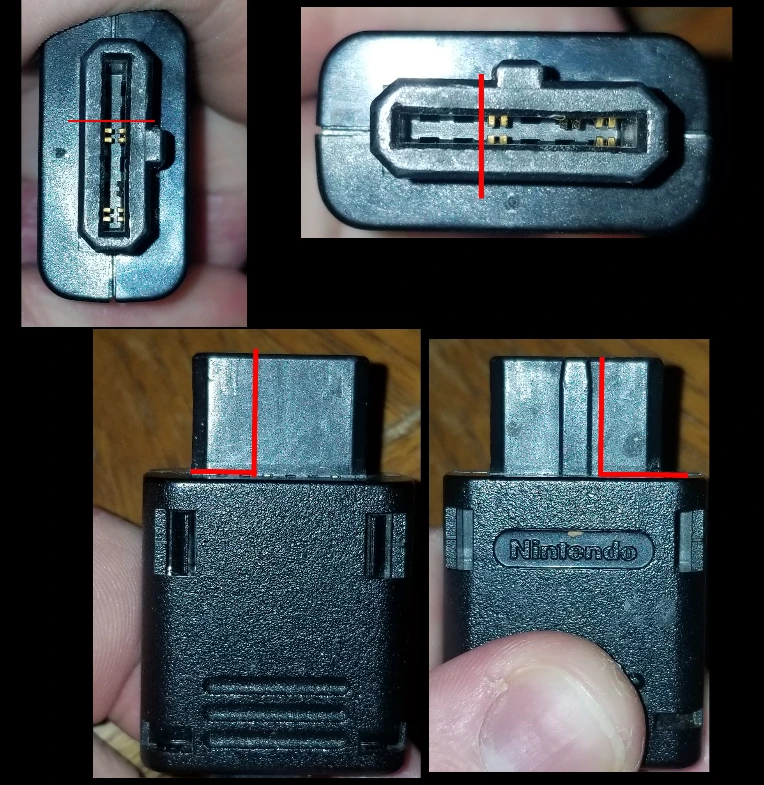
You want to cut an L shape in the connector being sure to avoid the pins. (You don’t have to cut all the way to the base of the plastic as seen with the modified cable plugged into the Wii. This isn’t entirely accurate, but it gives you a rough idea as to where you’d cut.) The top two images show where you’d cut to avoid the pins. The bottom two show roughly how you’d cut the L in the plastic. (Once you actually cut through the plastic in a straight line, you’ll basically want to remove the rest of the plastic on the dead side.
Here is the same example but with the modified cable. You can see that in doing this with just a pocket knife (It wasn't even a good one) with only physical reference and not knowing much about what your doing, you might end up bending the pins in some fashion, but at least they still work in my case.
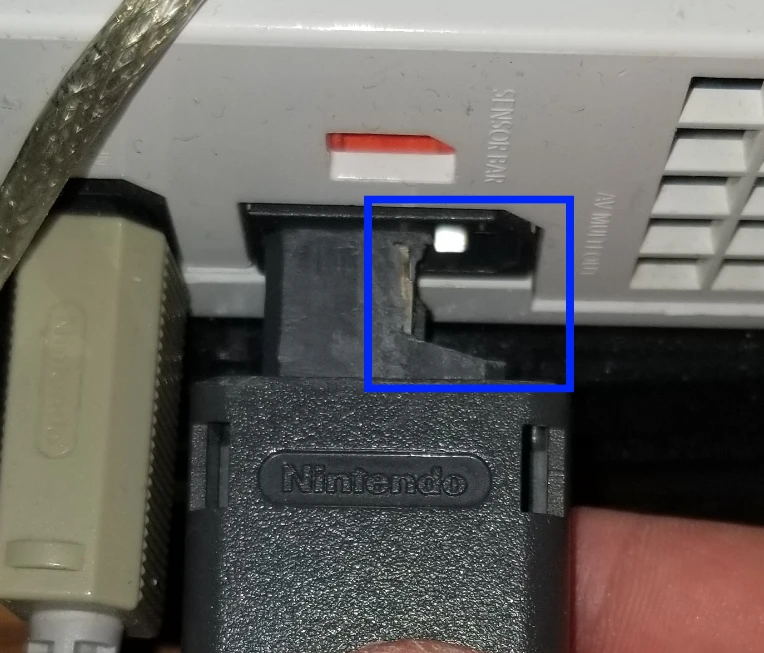
Once you've done that, you'll notice that there is a lot more space for the connector to fit into the port, and it should slide right in (hopefully). Here's the space on mine.
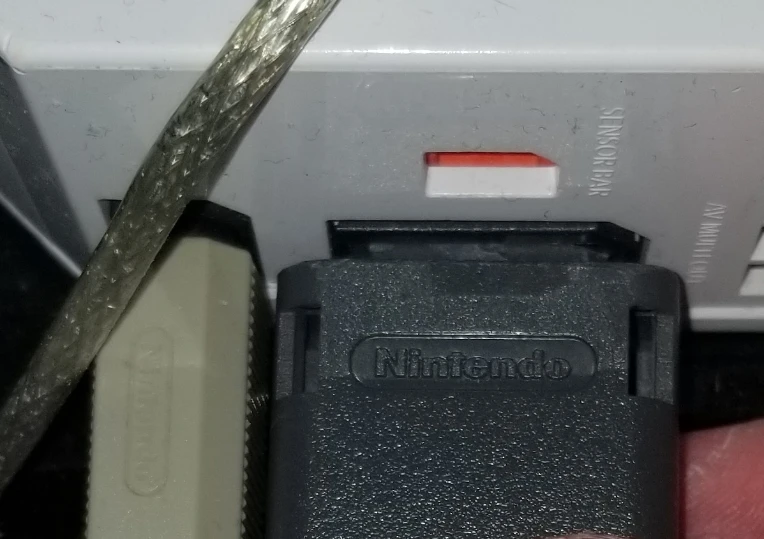
Here's the Wii's Component Cable plugged into the Wii in comparison.

And that's basically it. It does function and there doesn't seem to be a ton of differences between the two (The GC A/V Cable might be brighter, idk) Here's a comparison between the Component and GC A/V Cables (Playing Super Mario 64 to test this):
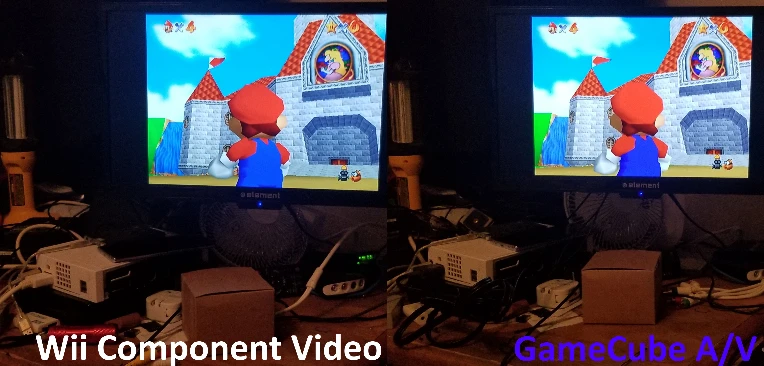
I had cable tied the modified cable to show that it really was plugged into the Wii & the TV, and it isn't some other cable. While the component cable is hard to see behind the TV, but it is there. Due to the quality of my mod and how I did it, nudging it in certain ways will make the signal be disconnected briefly.